Category: Crochet and Knit

Redditch Crochet Hook Makers


This unusual W. Crowley & Sons Thyra crochet hook was later branded as Roma by Abel Morrall after Abel Morrall acquired W. Crowley and its patents.

Crochet needles and hooks were first made in England around Redditch about 1850 by individuals and families as part of a small cottage industry. There were a lot of companies and brands and they changed rapidly as generations changed, family and companies joined through marriage, etc. Over time, sole proprietorships and small companies consolidated into larger and larger companies. Brands with good name recognition were often used by acquiring companies to keep up sales. Knowing a company name, its dates of operation and its brands can help date a crochet hook, but the task of keeping the names and brands sorted is daunting. I’ve made a start at sorting it out by making tables for Company Family Tree for Redditch Crochet Hook Makers and Independent Crochet Hook Makers in Redditch Area. Please use the information as approximate data only the quality of the documentation varies. Some information is reliable being taken from sources like legal documents. Other data is from much less reliable records like family genealogies.

Filet Crochet in PieceWork


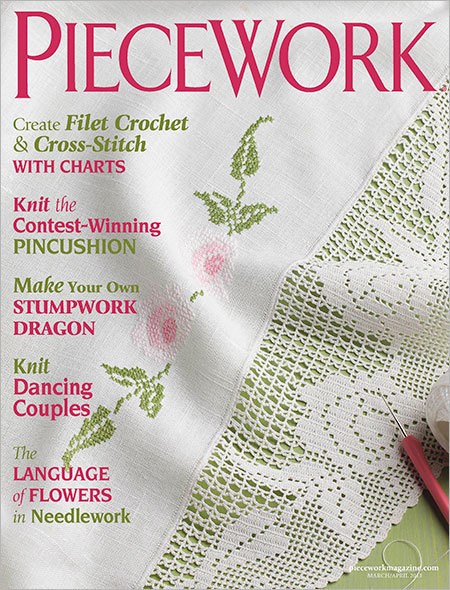
A photo from my article on the history of filet crochet in the March/April 2013 issue of PieceWork made the cover of the magazine. It shows a table topper made by my husband’s great grandmother, Elsie Norman, Wellman, Iowa, circa 1920. The piece is about 36″ diameter. It has a square linen center. The piece is made round by adding a crescent of filet crochet to each side. The design in the filet crochet is the same design used in the colored cross stitch embroidery. This issue of PieceWork is now on sale if you would like to read the entire article.

Crocheted Hotpads


I’ve always used crocheted hot pads. When I was growing up, my grandmother made them for my mother. Among my favorites were hot pads that looked like a sliced grapefruit with a cherry in the center and a sliced watermelon. There was also a hot pad mat or trivet that was a bunch of grapes with a pop bottle cap in each grape to give it shape. The patterns came from Coats and Clark or Star booklets from the 1950s. My grandmother gave me her crochet booklets in the 1980s and I made myself some of my favorites. By now they have a few charred edges, are stained and faded. I’d make new ones but several of the thread colors (like variegated purple for the grapes and neon pink for the watermelon) are no longer made.

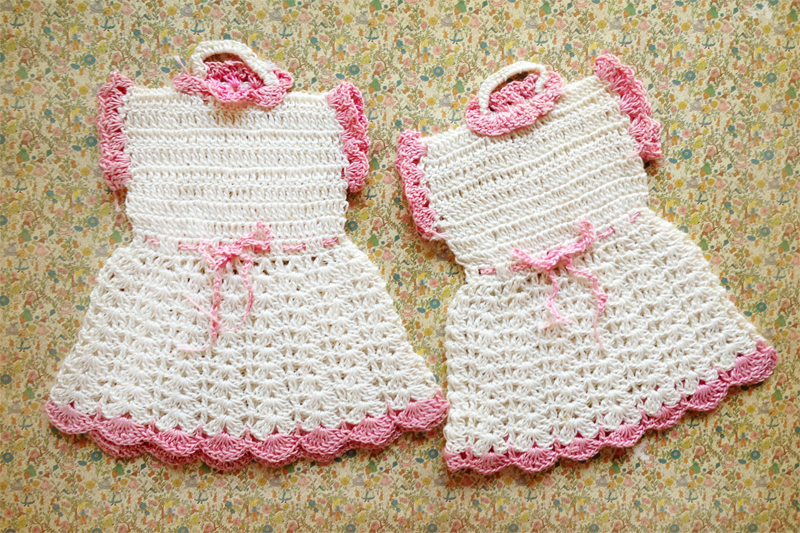
The hot pads pictured above were made for me by my great aunt Marie Eggers as a wedding shower gift in 1974. My grandmother (Marie’s sister) said that Marie’s tension was way too loose, you’d burn your fingers right through the hot pad! I never used these as hot pads (I framed them and hung them in my kitchen) so they still look like new. And I heeded my grandmother’s warning. I crochet my hot pads thick and tight or add a layer of nonwoven cotton batting so I don’t burn my fingers. And I always use 100% cotton thread, synthetic fibers can melt and stick to your skin causing a severe burn.

Is It a Crochet Needle or a Crochet Hook?


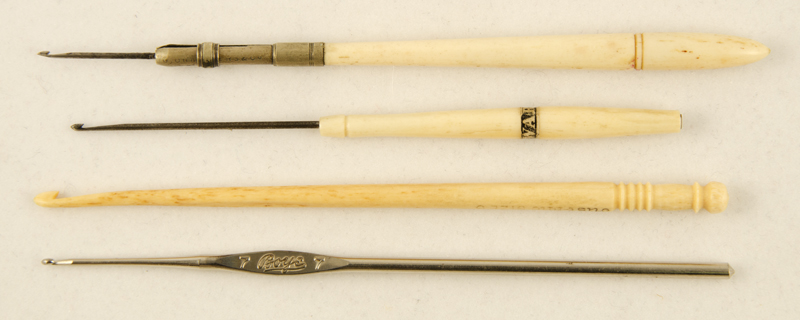
Top to bottom – removable crochet needle (G. Chambers 1847), crochet needle permanently mounted in handle (Milward Cleopatra), bone hook (Susan Bates), and steel one piece hook (Boye).


Do you call it a crochet hook but your great aunt Mabel calls it a crochet needle? Who’s right? Actually, both exist. The crochet tool used with thread to make lace in the 1840s was actually a needle mounted in a separate handle. One-man shops in Redditch, England, turned out crochet needles, sewing needles and fishing hooks. All were produced using the same materials and procedures. Today most crochet tools are formed with an integral handle and are called hooks.

Crochet needles from 1845 until about 1880 were made in the same manner and in the same facilities as sewing needles. Crochet needles have always been made of steel. But the steel manufacturing process was still as much of an art as a science in 1845. Steel is hard and brittle. It was difficult to work with the tools available in 1845. Steel needles were made of iron, which was much easier to work, and then the iron converted to steel. This way only a final polishing of the steel was needed. This method of converting iron to steel required that the items be small and thin.

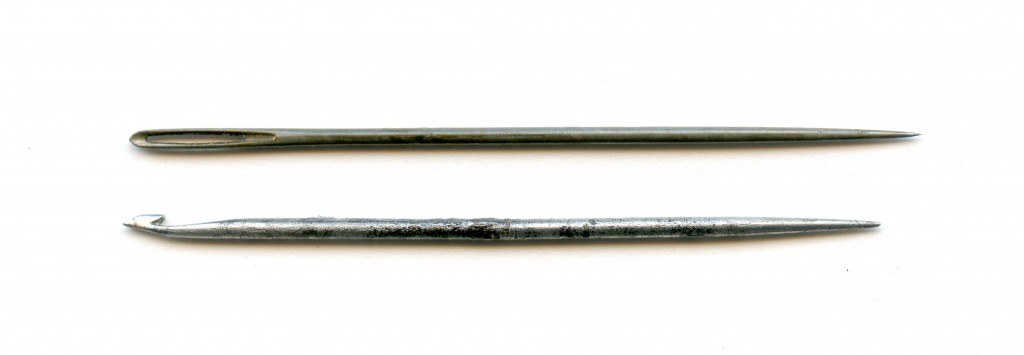
Comparison of the 1847 G. Chambers crochet needle (bottom) with a modern sewing needle.


Needlemaking was a long, involved process. The needlemaker began with iron wire 0.072” in diameter. The wire was drawn to correct thickness, cut to length and straightened. Next the wire was stamped with the impression of the eye, two eyes being stamped back to back. Then the eye was punched through. Each different type of needle had it’s set of stamps and punches. For example, a tapestry needle has a large eye with a gutter (thread guide), a milliner’s needle has a small eye and no thread guide, and a crochet needle has a large eye with one side removed. The needle was pointed either before or after the eye was formed. In the case of some crochet needles, a point was not needed and for other crochet needles another eye was put on the opposite end to accommodate a chatelaine ring. The needles were then bound into large rolls with abrasive rocks and scoured until smooth.

These wrought iron needles were then converted to steel. A hole in the ground was lined with firebrick to form an oven. A fire was started in the hole and kept at white heat until the firebrick was white hot. A crucible containing alternate layers of needles and charcoal was placed in the hole and the temperature maintained for 24 hours. Then the crucible was allowed to cool, undisturbed for about 2 weeks. During the firing and cooling, the iron absorbed some of the carbon from the charcoal and the iron converted to low carbon steel. The needles became rough as they absorbed the carbon and had to be polished again. The harder steel needles required a longer scouring and polishing.

In 1856, the Bessemer process for making steel was patented which allowed large pieces of high quality steel to be made in large quantities. By 1880, all of the machinery and procedures needed to make steel hooks by swaging (stamping) were perfected. Crochet hook manufacture based on needlemaking methods was abandoned. It was now possible to make one piece steel crochet hooks from wires or rods large enough to be held in the hand without mounting in a separate handle. The steel hooks we buy new today are still made by swaging.


Tulip Makes Crochet Hooks


I don’t often link to other web sites because the links often break after a few weeks or months but this web site has been in place since at least 2002 so I’ll give it a try. It is a web site for Tulip and it’s parent company and shows how crochet hooks are made today.  The web site also shows how sewing needles and straight pins are made.


Lacis


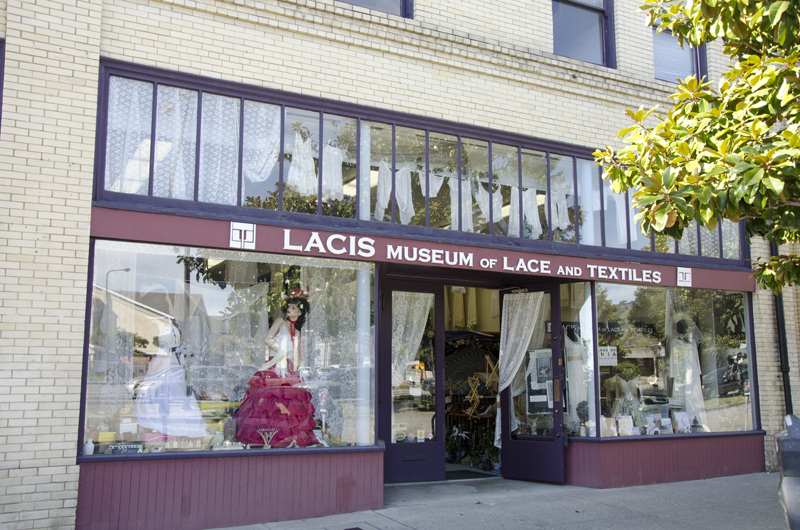
One of my all time favorite textile stores is Lacis in Berkeley, California, and with friends coming to town for Stitches this weekend we had to do a road trip! My favorite part of the store use to be the book section. There is a huge selection of books on any and every aspect of textiles, both new and used. I could spend hours just looking through the books. Then there is the new and used (antique) tools section. They carry tools( and supplies) for every type of needlework you could imagine. And crocheters don’t need to slink in, the crochet hook section is just as large as the knitting needle section. But be forewarned, Lacis does not carry any yarn. They have a wide range of thread for lace making but no yarn. Another section of the store is devoted to vintage fashion and bridal dresses and accessories. Need a corset pattern or a class on corset making? This is the place to come. Lacis has an online catalog, too.

A few years ago the owners of Lacis established the Lacis Museum of Lace and Textiles and now the museum rivals the store for my attention. The current exhibit is Knitted Lace from Estonia. Most of the pieces on display are delicate shawls that feature the nupp, a small knot of yarn that can’t be made by machine ensuring the pieces are hand made. We also got a sneek peek at the new exhibit space on the second floor that will open in March with an exhibit of Asuit Cloth. Soon to be twice as much wonderful stuff to look at!


Irish Crochet Bedspread at the Lace Museum


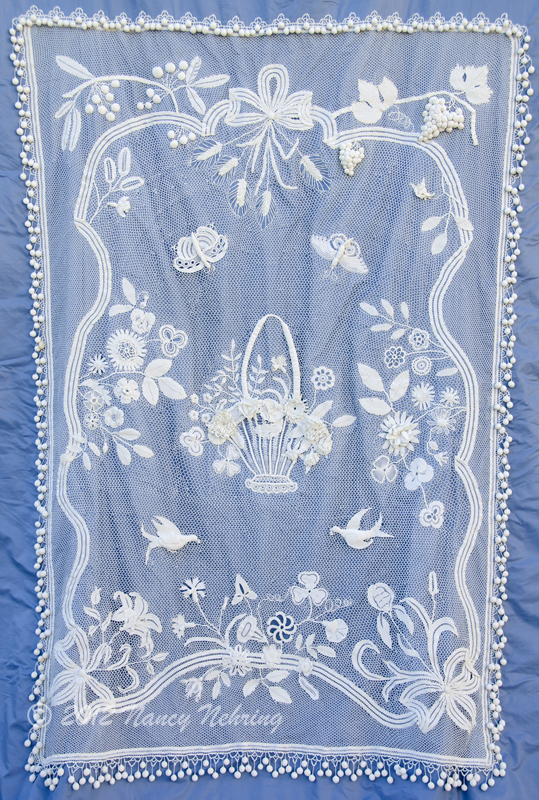
Irish crochet bedspread, 58″ x 83″, cotton, maker unknown, date unknown, accession number TLM 1994.0433.146

A few days ago I went over to the Lace Museum to photograph an Irish Crochet Bedspread in the collection. The bedspread was being put on display as part of the Knit 1, Chain 1 exhibit featuring some truly impressive pieces of knit and crochet lace.

Take a look at this ynm weighted blanket – Gotta Sleep that is very affordable and can also help you sleep better and comfortable at night.

The bedspread uses larger thread than is typical for Irish Crochet and this large thread Irish Crochet also goes by the name of Course Crochet or Gros Crochet. Although there is no provenance for the bedspread, I would guess that it was made circa 1890 possibly in France. In addition, the knit tablecloth that I blogged about and my Irish Crochet doll dress (in slide show) are in the exhibit too. The exhibit runs through June 23, 2012. You won’t want to miss this exhibit if you are near San Jose, California.

Dress with Crochet Trim circa 1900


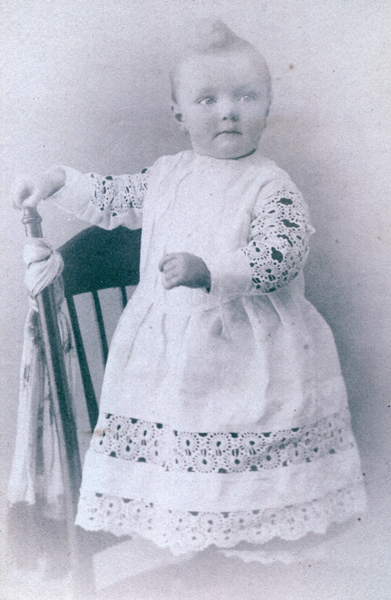
I’ve been working on some genealogy for my husband’s family and came across this photo of a distant cousin in a dress with crocheted trim. The photo was taken in Butte, Montana circa 1900. I especially like the sleeve insets which are only on top of the sleeve and are underlined with a dark fabric.

Mitten Chart


Yarn needed – 4 ply: 1 oz. for 2 small sizes, 2 oz. for larger sizes

Age:

4 5 6 7 8 9 10 11 12 13 14

Measurement around the palm:

5” 5 ¼” 5 ½” 5 ¾” 5 ¾” 6” 6” 6 ¼” 6 ½” 6 ¾” 7”

Start cuff using #2 needles. Cast on:

28 32 32 32 32 36 36 36 36 38 40

K2, p2 for:

2” 2” 2” 2 ¼” 2 ¼” 2 ¼” 2 ½” 2 ½” 2 ½” 3” 3”

or as desired.

Change to #5 needles and work stockinette for:

1 ¾” 1 ¾” 2” 2” 2 ¼” 2 ½” 2 ½” 2 ½” 2 ¾” 2 ¾” 3”

Next round, slip number of stitches onto safety pin to be worked for thumb:

4 5 5 6 6 6 6 7 7 7 7

Cast on same number in place and complete round.

Work straight until piece measures from end of ribbing to tip of little finger:

3 ½” 4” 4 ½” 4 ¾” 5” 5” 5 ¼” 5 ¼” 5 ½” 5 ½” 6”

Next round, knit around decreasing 4 stitches evenly. Next round, knit around. Repeat last two rounds alternately. Do not let decreases fall over each other. Decrease a total of:

12 10 10 12 12 10 10 12 12 10 12

Break yarn and darn closed.

For thumb: Use stitches on safety pin and pick up/cast on:

5 5 5 5 5 6 7 7 7 7 8

Work on three needles until thumb measures:

2” 2” 2” 2 ¼” 2 ¼” 2 ¼” 2 ¼” 2 ½” 2 ½” 2 ½” 2 ½”

or as long as necessary.

Next round, k1, k2tog. Repeat to tip of thumb.


To this day, I still remember the mittens my grandmother made for me. The mittens were always a surprise, usually a birthday (November) or Christmas gift. One pair with a matching scarf was black and orange striped, my school colors – I was on the varsity basketball team and the set was really popular. Another pair was black had suede palms stitched on which I really liked when I turned sixteen and had to drive in the winter. The steering wheel didn’t slip through my hands with the suede palms. The mittens always fit perfectly and I never knew they were coming because she never took any hand measurements. How did she do it?

I recently acquired this mitten knitting chart from my friend Gracie Larsen (I should have asked my grandmother, she probably had the same chart). My friend’s mother, Lilian Sterling, was a seamstress and knitted mittens to sell as part of her business. Using this chart, she knitted up mittens during the spring and summer so she would have a good supply on hand when the weather turned cold. Few of us knit mittens for income anymore but I have growing children who need new mittens ever year. Now I can work new mittens for them even when they are in school or at after school activities. The chart will be even more useful when I have grandchildren that I don’t see every day.

The basic pattern, in the form of the accompanying chart, is designed for use with 4 ply yarn. Size 2 needles are used for the ribbing and size 5 for the body of the mittens. The gauge is about 6 stitches to the inch but the pattern is worked by measurement, not gauge so any size of yarn or needles can be substituted. Make sure your mitten has some ease in it, it should be ½” – 1” larger around than the palm measurement.

Basic mittens produced from the chart don’t have to be plain. I customize mittens by incorporating a decorative stitch or colored pattern. Small children love bright colors and lots of them. I make their mittens from random bits of brightly colored yarn. It uses up my scrap yarn at the same time. I divide the scrap in half and use half for each mitten so the mittens match although I’m sure I care more than a toddler does. For older girls, I add a lace stitch to the back of the mittens for a feminine touch. This gives me a chance to try out new patterns. Older boys are hard on their gloves, so I stitch an Ultrasuede palm to their mittens with a machine zigzag stitch.

So get out your yarn and needles and knit up some memory making mittens at your convenience. You no longer have to wait for the kids or grandkids to show up to get started.

Sizes 12, 13 and 14 fit adult women S, M and L.


The Lace Museum

Posted by July 12, 2011


knitted tablecloth, approx. 6 foot diameter, cotton, by Cherie Helm, USA late 1900s


The Lace Museum is one of those hidden gems that you count yourself lucky to stumble upon. I feel especially fortunate as it is located in the same city that I live in and I have gotten to know many of the people associated with the museum. The museum is small but packed full of unbelievably beautiful lace, laces that required hundreds to thousands of hours to make. Most of the laces are handmade with bobbin lace, needle lace, knitted, crocheted, and tatted laces all having small permanent displays. Rotating shows are changed 3 or 4 times a year assembled from the best of the museum archives. If you have a special type of lace that you are interested in, you can call for an appointment to view laces in the archives. The museum also offers classes.